
How to wire a motorcycle turn signal with a universal switch
2026-05-07
Wiring a motorcycle turn signal system with a universal switch is a common upgrade for custom bikes, older motorcycles, or aftermarket handlebar replacements. A universal switch offers flexibility but requires careful attention to wiring diagrams and component compatibility. Aicheng provides reliable electrical components and wiring accessories to help riders complete this task safely and efficiently.
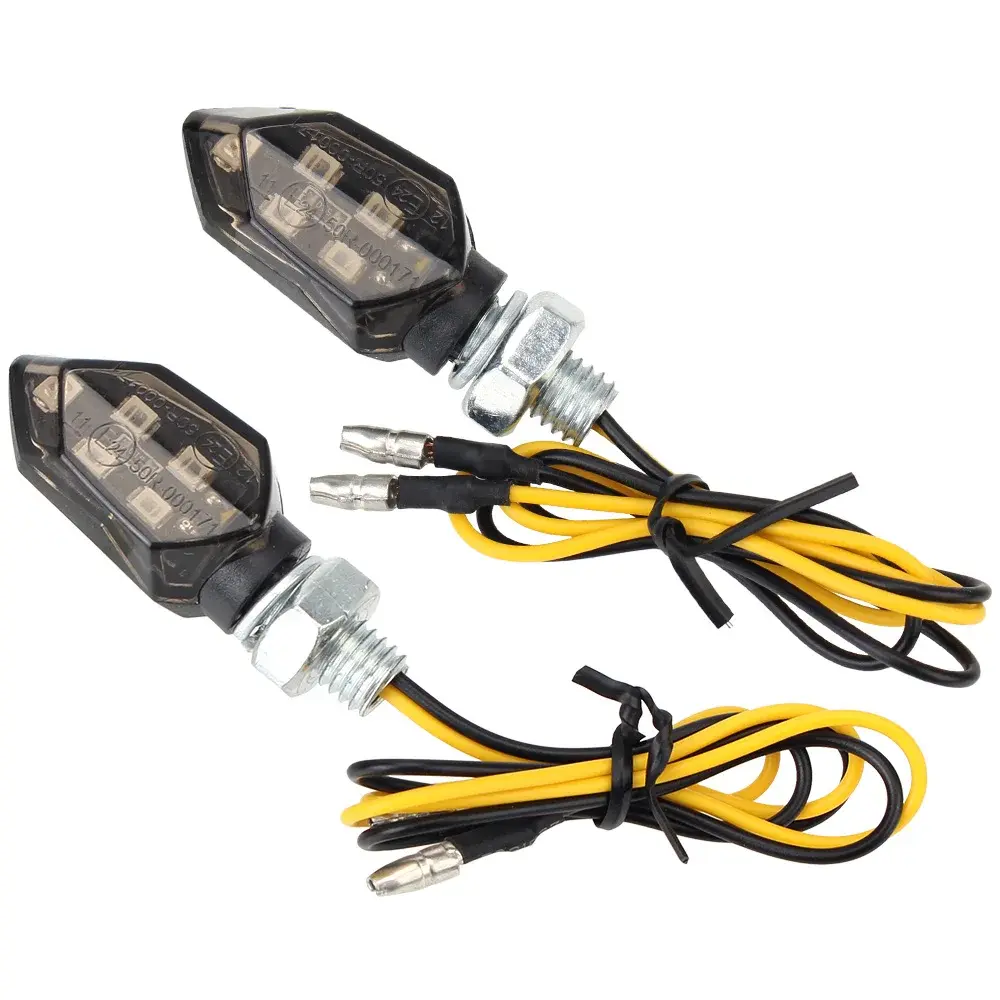
Before starting, gather a universal handlebar switch, a motorcycle turn signal flasher relay (LED-compatible if needed), wire strippers, connectors, and a multimeter. The universal switch typically has color-coded wires: left signal (usually orange or light blue), right signal (blue or dark blue), flasher power input (gray or red), and ground (black). Below is a standard wiring guide.
| Wire Color (Common) | Function | Connects To |
|---|---|---|
| Orange or Light Blue | Left turn signal output | Left front and rear signal positive wires |
| Blue or Dark Blue | Right turn signal output | Right front and rear signal positive wires |
| Gray or Red | Flasher relay input | Flasher relay output terminal |
| Black | Ground | Motorcycle frame or battery negative |
| Brown (if present) | Running light (optional) | Taillight running light circuit |
Step-by-step wiring procedure:
-
Disconnect the battery negative terminal.
-
Remove the old switch and trace the existing motorcycle turn signal wires.
-
Install the Aicheng universal switch on the handlebar and route the wires along the factory harness.
-
Connect the flasher relay: The relay’s B (battery) terminal goes to a fused 12V source. The L (load) terminal connects to the universal switch’s gray (input) wire.
-
Match the universal switch output wires to the corresponding motorcycle turn signal positive wires. Use crimp connectors or solder for secure joints.
-
Connect the universal switch’s black ground wire to a clean frame ground or battery negative.
-
Test each function with the battery reconnected before final wrapping.
Common issues and troubleshooting table
| Symptom | Likely Cause | Aicheng Solution |
|---|---|---|
| Signals flash too fast | LED signals without load resistor | Use Aicheng LED flasher relay |
| One side stays on | Bad ground or short | Check black wire ground connection |
| No flash at all | Dead flasher relay | Replace with Aicheng universal relay |
Motorcycle Turn Signal FAQ
Question 1: Can I use a universal switch with LED turn signals without changing the flasher relay
Answer: Yes you can but the factory flasher relay designed for incandescent bulbs will cause hyper-flash because LEDs draw much less current. To fix this, replace the stock relay with an LED-specific flasher relay such as the Aicheng LED flasher relay. Alternatively, add load resistors in parallel with each motorcycle turn signal LED to simulate the current draw of a standard bulb. The relay method is cleaner and more reliable.
Question 2: Why does my universal switch make both turn signals blink at the same time like hazard lights
Answer: This usually means the left and right output wires from the universal switch are shorted together, or the flasher relay is connected incorrectly. Check if the switch’s orange and blue wires are touching bare metal or spliced together. Another possibility is a damaged diode inside the stock indicator light on the dashboard; some old bikes route both signals through a single dash light. Install two diodes (one on each signal wire) leading to the dash light to prevent backfeed. Aicheng offers pre-assembled diode kits for this exact issue.
Question 3: How do I wire a universal switch without a factory wiring diagram or color codes
Answer: First, identify the common wires on the universal switch using a multimeter in continuity mode. With the switch in neutral position, find the wire that connects to ground (black). Then activate left turn and probe which output wire connects to the flasher input wire (gray). Right turn similarly. For the motorcycle side, use a test light or multimeter to locate the left and right motorcycle turn signal positive wires by back-probing the stock harness connectors. Label everything with tape before cutting. Aicheng sells a universal wiring kit that includes labeled wires and a printed pinout guide, making this process much easier for beginners.
After completing the wiring, secure all connections with heat shrink tubing and zip ties to prevent vibration damage. Test the motorcycle turn signal operation with the engine running to confirm stable voltage.
Contact us for expert advice on motorcycle turn signal wiring or to explore Aicheng switches, relays, and wiring kits. Reach out through our website contact form or email support for fast troubleshooting help and product recommendations tailored to your bike.
